Simple Spaghetti Sauce

My parents have always made their own spaghetti sauce. My Mom has her own version and my Dad has his own version. Don’t worry, it’s not a family war, it’s a known fact that my Dad’s version is better. My mom will admit this.

For many years, I too had my own recipe… which was going to the store and buying a jar of sauce. Having my Dad’s sauce was a treat, but in the last few years I’ve realized how easy and not so time consuming it is to make your own sauce… and how it tastes 100% better. So, I’m here to spill the secret recipe.

I like to make a big batch of this and freeze any leftovers I have.
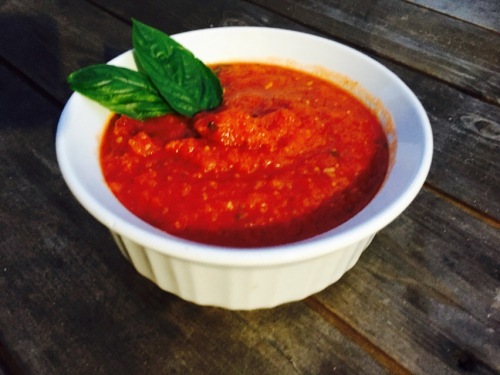
 My Dad’s Simple Spaghetti Sauce

Ingredients
2 tablespoons of olive oil
5 cloves of garlic, minced (or more!)
2 28oz cans of diced tomatoes (organic, plz)
1 15oz can of tomato sauce
2 teaspoons of granulated sugar
1-2 pours of good red wine (A few tablespoons each pour)
2 teaspoons of oregano
2 teaspoons of Italian seasoning
Fresh basil if available
salt and pepper to taste
DIRECTIONS
1. Add the olive oil to a large saucepan. When it starts to shimmer add the garlic. Cook for a minute or two so that the garlic turns a golden color. Stop before it turns brown!
2. Add the tomatoes, tomato sauce, red wine, 1 tablespoon sugar and spices. Let this simmer on medium-low for 20 minutes. (NOTE: if you want a thicker sauce, drain the tomatoes and keep the juice for when you make soup or bloody mary mix).
3. Stir the pot often, but try not to let the water that will collect on the lid get into the sauce!
4. After 20 minutes, taste the sauce and see what else it needs. More spices and wine never hurt (I think I need an apron that says that..) if it tastes too acidic add more sugar. Add in fresh basil if you have it here.
5. Cook for 20 more minutes at a tad lower heat, stirring frequently.
6. Use an immersion blender to smooth out the chunks to the consistency you want your sauce to be. I tend to like a balance between smooth and chunky so I do about 15-25 seconds of blending. The blending will break up the basil as well.
7. The sauce is ready to eat, or feel free to continue simmering. The longer it cooks down, the better it tastes.

See? Not hard. You have to chop some garlic, open some cans, shake in some spices and things and stir a few times! This sauce is even better (200%?) if you have tomatoes that you canned your self. You can even use fresh tomatoes that you roast or fresh tomatoes that you chop.

Invite me over!

Blueberry Crumb Cake

It’s blueberry season and I have been eyeing a blueberry crumb cake recipe from Smitten Kitchen for a few weeks. I have bought blueberries at the farmers market or store every week, but never bit the bullet and made the cake. (Or, Brent ate them all, but I’m not here to play the blame game!)

 I walked into my pal Sarah’s (I think she is my #2 biggest fan?) baby shower, and there was the cake sitting on the counter! I started squawking and asking our gracious host: “TERESA! IS THAT THE SMITTEN KITCHEN BLUEBERRY CRUMB CAKE?!” Yes. It was. I ate it and it was so tasty I knew I’d be making it later that day to share with all of my pals at work.

And I did. And you should to. Here’s how.


 Blueberry Crumb Cake
serves 8-10 // recipe from Smitten Kitchen

Ingredients
Cake:
2 cups minus 1 tablespoon (i.e. 1 3/4 cups + 3 tablespoons or 240 grams) all-purpose flour* see note
2 teaspoons baking powder
1/2 teaspoon table salt
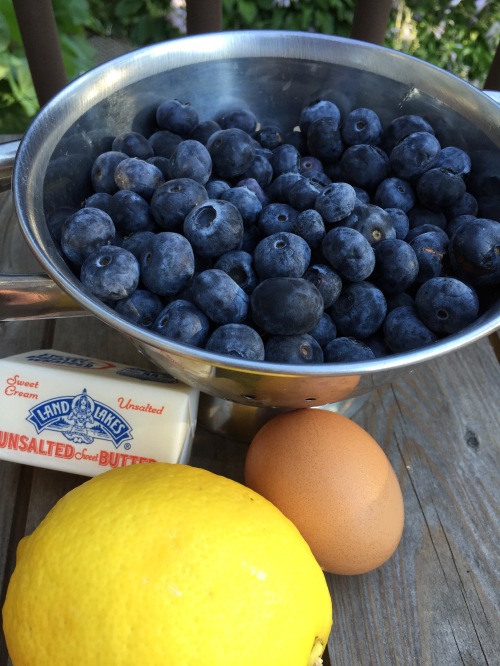
4 tablespoons (1/4 cup, or 55 grams) unsalted butter, softened
3/4 cup (150 grams) granulated sugar
Zest of 1 lemon
1 large egg
1 teaspoon vanilla extract
1 pint (2 to 2 2/3 cups, 12 to 16 ounces, or 340 to 455 grams) fresh blueberries, clean and dry
1/2 cup milk, any kind
Confectioners’ sugar, for dusting

Topping:
5 tablespoons (40 grams) all-purpose flour
1/2 cup (100 grams) granulated sugar
1 teaspoon ground cinnamon
4 tablespoons (1/4 cup, 2 ounces or 55 grams) unsalted butter, cold is fine
Pinch of salt

DIRECTIONS
1. Heat oven to 375°F. Wash and dry your blueberries… dry them super well!

2. Butter a 9-inch round baking pan (with at least 2″ sides) and dust it lightly with flour; line it with a round of parchment paper just on the bottom of the pan. (As a note, my pan was 9″ but only had a 1.5″ side, so I made Brent his own tiny cake. This worked fine, but the end result would look nicer if you used a pan with at least a 2″ side.)

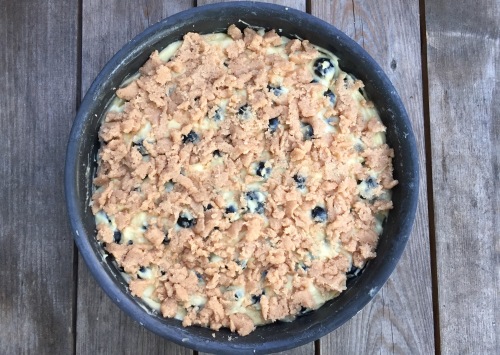
3. Make the topping by mixing the flour, sugar, cinnamon and salt, then cutting the butter in with a pastry blender, fork or your fingertips until the mixture resembles coarse crumbs. Set aside. Note, this is going to seem too wet for a crumble topping. If you want add another teaspoon of flour, but if you don’t it turns out just as fine.

4. In a medium bowl, mix your dry ingredients: whisk flour, baking powder, and salt until combined. *Flour note: I used a 50/50 mix of all purpose flour and whole wheat flour the second time I made this and I prefer this method. Try it!

5. In a large bowl (or stand mixer), beat butter, sugar and zest of the lemon together until light and fluffy. Add egg and vanilla and beat until combined.

6. Beat in 1/3 of the dry ingredient mixture until just combined, followed by 1/2 the milk; repeat with remaining dry ingredients and milk, finishing with the dry mixture. The batter will be very stiff, and that’s ok!

7. Fold blueberries (carefully) into cake batter until evenly distributed.

8. Scoop cake batter into prepared pan and smooth so that it is flat. Add the topping. Bake in heated oven for 40 minutes, or until a toothpick inserted into the middle of the cake comes out batter-free.

 9. You can let the cake cool completely in the pan on a rack (I’d recommend this as I didn’t do it, or just cool it in the pan for 20 minutes before flipping it out onto a cooling rack, removing the parchment paper lining, and flipping it back onto a plate.

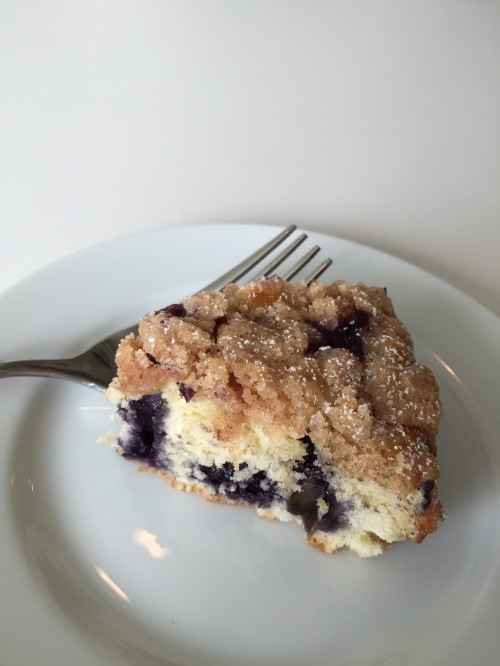
10. Be extra fancy and dust with confectioners’ sugar. I just used a fine mesh strainer and about 2 teaspoons of confectioners’ sugar and shook it on top. It made it look like I was an expert baker or that I bought it at a fancy bakery.

 I gave my co-workers a reason to eat cake in the morning, and they liked it so I think this will be something I make  again soon. Maybe my next excuse will be when Sarah has that baby in a few weeks. At least I won’t be the one sqwaking!

Homemade Cheez-Its for Megan

Our two pals (Justen & Megan, nosy) are marrying each other next weekend and we have been celebrating! Most recently at Megan’s bachelorette party, held at a beautiful Minnesota winery.

Meg sometimes gets hangry and loves Cheez-Its (who doesn’t….) so I thought a nice part of her gift would be a homemade version that might soak up the wine the next day.

This recipe was harder than driving to the store and opening up a box of crackers, but barely. It has only a few ingredients and tastes fantastic. These are not a health food, but a fun gift or snack for a party.

I found many recipes but the one I went with, which was great, was America’s Test Kitchen inspired.  Homemade Cheez-Its
serves 1 Meg // recipe adapted from America’s Test Kitchen and Tracey 

Ingredients
6 oz (1 1/2 cups) grated extra sharp cheddar cheese
1/4 cup (1/2 stick) unsalted butter, at room temperature
1 1/2 teaspoons salt
1/2 teaspoon black pepper (or more, I put another shake in)
1/2 cup plus 2 tablespoons all-purpose flour
2 tablespoons cornstarch
2-3 tablespoons water

DIRECTIONS
1. Preheat oven to 375 F.

2. Line two baking sheets with parchment.

3. Add cheese, butter, salt, and pepper to the bowl of a stand mixer fitted with the paddle attachment, or add to a food processor. Mix on low speed until the mixture comes together and starts to stick to the sides of the bowl, about 30 seconds.

4. Add the flour and cornstarch, beating until incorporated – the mixture should look like coarse sand.

5. Mix in 2 tablespoons of water. (If the dough seems too dry, you can add up to 1 tablespoon of additional water to bring it together.)

6. Turn the dough out onto a lightly floured work surface and shape into a disk. Wrap in plastic wrap and refrigerate for at least 30 minutes.

7. On a lightly floured work surface, roll the dough into a rectangle with a rolling pin to about 1/16-inch thick. Using a pizza cutter or knife, cut the dough into 1-inch wide strips, then cut 1-inch squares from those strips. (If you have  fancy-edged-pastry cutter, use it! Also, the size of the cracker doesn’t have to be perfect.)

8. Transfer the squares to the prepared baking sheets – pack them in pretty tightly, they don’t spread very much!

9. Using the flat end of a wooden skewer (or something similar), poke a hole in the center of each dough square.

 10. Bake the crackers until the edges just begin to turn gold brown, which takes about 15-20 minutes. (Check them and turn the pan in the oven after ten minutes, then check again at 15 minutes, then every few minutes after until they are done.

11. Let the crackers cool on the baking sheet.

Pack them up in a mason jar, tie a bow around it and give it to your favorite bachelorette of the month. Or yourself. Or anyone else. Everyone will be jumping for joy.


Soft Pretzels

One weekend Brent sent me an email with the subject line: “To Try.” The only thing in the body of the email was a link to Alton Brown’s soft pretzel recipe.

20141207-174053-63653071.jpg

Clearly, I tried the recipe and it was delicious and pretty easy. And a reason for you to use the 90 pound stand mixer you likely got for your wedding, or got yourself as a gift for going to so many weddings.

Here’s what to do!

Homemade Soft Pretzels
serves 8  // recipe from Food Network/Alton Brown

Ingredients

Pretzel dough
1 1/2 cups warm (110 to 115 degrees F) water
1 tablespoon sugar
2 teaspoons kosher salt
1 package active dry yeast
4.5 cups all-purpose flour (22oz if you measure it out on your kitchen scale)
1-2 tablespoons unsalted butter, melted

Other
Vegetable oil spray
10 cups water
2/3 cup baking soda
1 large egg yolk beaten with 1 tablespoon water
Pretzel salt

DIRECTIONS
1. In your barely used stand mixer, combine the 1.5 cups warm water, sugar and kosher salt in the bowl of a stand mixer and sprinkle the yeast on top. Allow to sit for 5 minutes or until the mixture begins to foam. (If you decide to use instant yeast like I did, you can skip the 5 minute wait time)

2. Add the flour and butter and, using the dough hook attachment, mix on low speed until well combined. Change to medium speed and knead until the dough is smooth and pulls away from the side of the bowl, approximately 4 to 5 minutes.

3. Remove the dough from the bowl, clean the bowl and then oil it well with vegetable oil. Return the dough to the bowl, cover with plastic wrap and sit in a warm place for approximately 50 to 55 minutes or until the dough has doubled in size.

4. Preheat the oven to 450 degrees F. Line 2 half-sheet pans with parchment paper and spray with some vegetable oil spray (like Pam). Set aside.

5. In the meantime, turn the dough out onto a slightly oiled work surface and divide into 8 equal pieces. Roll out each piece of dough into a 24-inch rope.

6. The semi-hard part! Make a U-shape with the rope, holding the ends of the rope, cross them over each other and press onto the bottom of the U in order to form the shape of a pretzel. I watched this video many times to try to copy Alton’s style. http://www.foodnetwork.com/videos/altons-homemade-soft-pretzels-0170183.embed.html

7. Place onto the parchment-lined half sheet pan.

8. Get a large pot and bring 10 cups of water and the baking soda to a rolling boil.

9. Place the pretzels into the boiling water, 1 by 1, one at a time, for 30 seconds. Remove them from the water using a large flat spatula. I let these dry on a cookie rack before returning them.

10. Once you have the pretzels on the parchment paper-lined pans, brush the top of each pretzel with the beaten egg yolk and water mixture and sprinkle with the kosher salt (unless you have pretzel salt!).

11. Bake until dark golden brown in color, approximately 12 to 14 minutes. I like to rotate the pan half way through cooking. Transfer to a cooling rack for at least 5 minutes before serving.

Not so hard and very delicious. I recently went to lunch with some co-workers and we ordered one pretzel for the table. It was not as tasty and it was $6. BOO!

So maybe you should e-mail this to your self with the subject line “to try” and make this for seven of your favorite co-workers.

So Granola

I failed to post in 2014. I cooked and baked a lot of things, but I didn’t always get (or remember to get) great pictures. I resolve to do better in 2015 and what better way to prove it than a recipe for homemade granola! Right? Right.IMG_0223

Brent is on a yogurt kick and did not like the fancy, organic, $10 million dollar granola I got him so I decided to make my own.

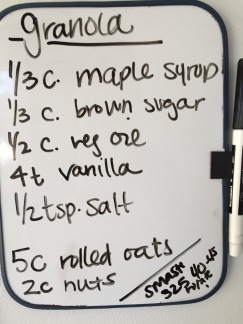
This was my first time making granola, so I’m the worst hippie ever. I decided to go with a very slightly adapted America’s Test Kitchen recipe because they obsessively test recipes and I trust them. Bonus: this was a no stir recipe. Not a bonus: they don’t publish their recipes without a subscription so I watched a video of the recipe 10 times. Pro tip: write the recipe down as you hear it on the video, like so:

2015/01/img_0240.jpg

But, let me make this easier for you.

Homemade Granola
serves 9+  //  recipe adapted from America’s Test Kitchen

Ingredients
5 cups rolled oats
1/3 cup vegetable oil
1/3 cup brown sugar
1/3 cup pure maple syrup (the real stuff!)
4 teaspoons vanilla
1/2 teaspoon salt
1/2 or 1 cup almonds, chopped
1 cup walnuts, chopped

DIRECTIONS
1. Preheat oven to 325°.

2. Measure out 5 cups of oats. Chop nuts to desired size (I used a food processor to make this easier.) Add to the bowl of oats. Set aside.

3. In a large bowl, mix oil, brown sugar, maple syrup, vanilla and salt together.

4. Add oats and chopped nuts to the oil/sugar/etc. mixture and stir well to coat.

5. Line a large pan with parchment paper, dump the granola out.

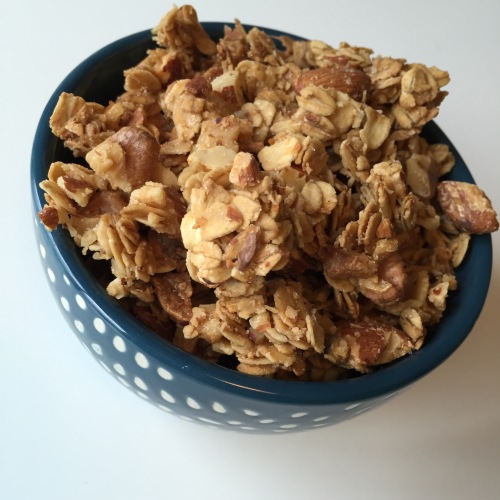
6. Using a spoon or a potato masher, smash down the granola on the pan as much as possible. This will help to create big chunks!

7. Bake at 325 for 40 minutes (it can go to 45 minutes depending on your oven). Rotate the pan once at the 20 minute mark. Take the granola out when it looks brown around the edges and on the top, not too brown!

8. Let the granola cool for an hour on the pan. Then, break it into whatever size chunks you want.

This stuff was tasty. And inexpensive to make. You can use whatever nuts you like and the original recipe also called for adding in raisins or other dried fruit after the granola cooled. Brent is a raisin hater, so I respected his hatred and left this plain. I did try a tiny bowl with some raisins, and it was delicious.

Store for up to two weeks, you hippie.

Cinnamon Crunch Skillet Bread

I saw a recipe on Pinterest that was described as a cross between monkey bread and cinnamon roll. The sound of it reminded me of my favorite Great Harvest bread Cinnamon Chip. I knew I would have to make it ASAP.

I tried to make this for/with my pals the other day but failed to read through the entire recipe to note that the dough required an two periods of resting time totaling about 1.5 hours. (Bolding that, in case you are like me!) Oops. So, make this recipe a day ahead, or start it early if you are a really nice early bird and want to make a delicious breakfast treat. Maybe just don’t make it when you invite people over who are really hungry!

This recipe IS super easy, but the way it was written, it looks elaborate. I’m going to break it down step by step.

Cinnamon Crunch Skillet Bread
serves 8+  // recipe adapted from Seasons and Suppers

STEP ONE: Make the dough
Ingredients
3 cups all purpose flour
3 Tbsp. white sugar
1 1/2 tsp. fine salt
3 tsp. instant or dry active yeast
1 cup milk, warmed to 105-110° F.
3 Tbsp. vegetable oil or melted butter

Step One Directions:
1. Proof the yeast in 1/4 cup of warm water, if you are using dry active yeast.
2. Combine the dry ingredients in a large bowl or the bowl of a stand mixer.
3. Add the warmed milk, vegetable oil and proofed (or instant, which I love) yeast.
4. Knead with the dough hook until dough is smooth, adding more flour by the Tbsp. as necessary. I did not have to use any more flour.
5. Remove dough to an oiled bowl, cover with plastic wrap and let rise to doubled, about 60 minutes.

STEP TWO: Roll the dough out20131117-141019.jpg
Ingredients
1 tablespoon butter, melted
1/2 tsp. vanilla

Sept two directions:
1. Clean your counters! Grease a 8-10″ oven safe cast iron skillet.
2. Divide dough into two pieces and roll into a rope about 3 feet long.
3. Liberally brush with melted butter mixed with the vanilla.

STEP THREE: Coat the dough in brown sugar20131117-141038.jpg
Ingredients
3/4 cup brown sugar
1 1/2 tsp. cinnamon

Step three directions:
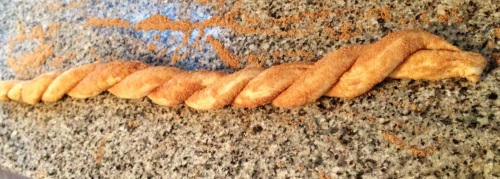
1. Pour the brown sugar/cinnamon mixture evenly alongside the buttered ropes and then roll the ropes in the mixture until evenly covered.
2. Pinch the end of the ropes together and then twist them together, pinching the other end once all twisted together.
3. Place twisted ropes into the skillet, starting from the centre and winding it around. (If you have some melted butter left over from brushing, feel free to drizzle it over the dough).
4. Cover the skillet with greased plastic wrap and let rise until doubled, it takes anywhere from 30-45 minutes.

STEP FOUR: Make the ‘crunch’ part of the recipe, bake! 20131117-141049.jpg
Ingredients
1/4 cup brown sugar
1 tablespoon butter, cold
1 teaspoon cinnamon

Step four directions:
1. Preheat oven to 350° F.
2. Prepare the streusel topping by combining dry ingredients and cutting in the cold butter with a fork. Set aside.
3. Once dough is doubled, sprinkle with streusel topping and bake for for 40-45 minutes, covering it with foil after 25 or 30 minutes if is dark enough.

STEP FIVE: Make the icing/glaze
1 cup powdered/confectioners sugar
3-4 tablespoons milk
2 tablespoons butter, melted
1/2 tsp. vanilla
pinch of alt

Step five directions: 
1. Add the milk to the powdered sugar. Stir well until smooth.
2. Add in the melted butter, vanilla and a tiny pinch of salt.
3. Pour evenly over bread once it has cooled a bit. Truth be told, I only used HALF of the icing, and then took half in a bowl for everyone to spoon over their bread.

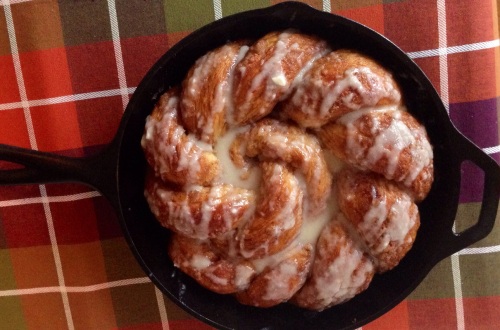
STEP 6: Look at how fancy the recipe you just made is! Eat!
20131117-141100.jpg

20131117-141114.jpg

I took this to a football (watching) party. NOT your typical football snack, but why not. These photos are a little blurry as I was running out the door. Sorry, but football waits for no one, apparently.

The dough was light and sort-of reminiscent of a croissant. The top was crusty and the bottom was gooey. This would taste best a little warm and fresh out of the oven with some coffee.

This is my 100th post. I’ll take my medal any time.

Pumpkin muffins

I invited Kate, Meg and Anna over to hang out and bake something elaborate yesterday. I had what I thought was the perfect recipe… except I failed to read the entire thing before we got started. After I realized it would take about 2.5 hours from start to finish and we were all getting hangry, I quickly (and secretly) googled muffin recipes and found this one. And it was a winner.20131116-203733.jpg

Pumpkin Muffins
serves 12+ // recipe from Smitten Kitchen

Muffin Ingredients
1 1/2 cups all-purpose flour
1 teaspoon baking powder
1/2 teaspoon baking soda
1/2 teaspoon table salt
1 teaspoon pumpkin-pie spice
1 cup to 1 1/3 cup canned solid-pack pumpkin (from a 15 ounce can, not pumpkin pie filling, which is sweetened and spiced)
1/3 cup vegetable or another neutral cooking oil
2 large eggs
1 1/4 cups granulated sugar

Topping
1 tablespoon sugar
1 teaspoon cinnamon

DIRECTIONS
1. Heat oven to 350 degrees. Put liners in 12 standard-sized muffin cups.

2. Stir or whisk together flour, baking powder, baking soda, salt and spice in medium bowl.

3. In a larger bowl, or in your stand mixer bowl, whisk together pumpkin, oil, eggs and 1 1/4 cups sugar.

4. Add dry ingredients to wet and stir until just combined. Divide batter among muffin cups (each about 3/4 full).

5. Stir together topping, tablespoon of sugar and teaspoon of cinnamon. Sprinkle over each muffin.

6. Bake until puffed and golden brown and wooden pick or skewer inserted into the center of a muffin comes out clean, 22-27 minutes.

7. Cool in pan on a rack for 3-4 minutes, then transfer muffins from pan to rack and cool to warm or room temperature.

pumpkin muffins

you will see the other recipe I started in the background, hanging out.

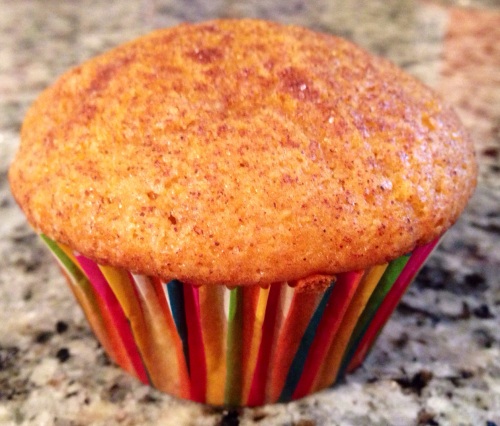
This recipe is so easy I made it from start to finish in about 30 minutes. The muffins are moist and fluffy, with a nice but not too sweet pumpkin flavor. My recipe turned out to fill more than the 12 muffin tins so I made a tiny little loaf of pumpkin muffin-bread. It worked perfectly.

I feel like these might even pass for cupcakes if you put enough frosting on them. In other words, they are delicious.

Stay tuned for that time-consuming, elaborate recipe tomorrow… which turned out to be just as easy. Oops.

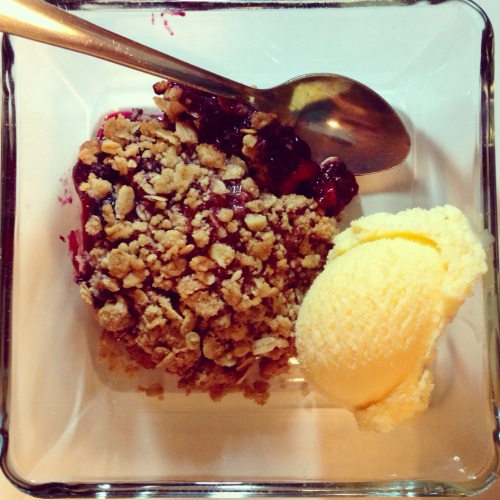
Mixed Berry Crisp

This dessert is so easy, you can make it on a weeknight. Seriously.

I happened to make this yesterday, even though I had cooking grandiose Sunday cooking plans that got quickly derailed by watching an episode of Cutthroat Kitchen on Food Network while very hungry. After watching a burrito challenge and a pie challenge, I knew what was for dinner (burritos!) and that we had to make a dessert.

One of the contestants made a crisp instead of a pie (and didn’t have to pack his knives and go), and all I could think about for the next hour was getting my hands on some mixed berries and ice cream. So I did. Well, Brent did. Good thing we moved closer to Trader Joe’s!

The contestant on the show made some crazy concoction, but I found the simplest recipe that called for a bag of frozen berries and basic stuff you likely have in your cabinets and a few tablespoons of butter.20131027-210247.jpg

Mixed Berry Crisp
serves 4   //  recipe adapted from Bon Appetite 

Ingredients
1 12-ounce packages frozen mixed berries
1 tablespoons cornstarch
1/3 cup (packed) golden brown sugar
1/4 cup unbleached all purpose flour
1/4 cup old-fashioned oats
1/4 cup finely chopped walnuts (I did this in a food processor)
1/4 teaspoon ground cinnamon
pinch of salt
2 tablespoons chilled unsalted butter, cut into 1/2-inch cubes

DIRECTIONS
1. Preheat oven to 425°F.
2. Toss frozen berries and cornstarch in large bowl. Let stand until cornstarch dissolves, tossing occasionally, about 20 minutes.
3. Mix brown sugar, flour, oats, nuts, cinnamon, and a pinch of salt in large bowl.
4. Add chilled butter; using fingertips, blend butter into mixture until coarse crumbs form.
5. Place berries in a small pie pan or baking dish and top with the oat mixture. (You can also do four single serving ramekins) and place dish(es) on rimmed baking sheet. Bake 15 minutes (10 minutes if you are using single serving ramekins).
6. Reduce oven temperature to 350°F and continue baking until crisp topping is golden brown and fruit filling is bubbling at edges, about 25-30 minutes longer.
7. Cool crisp at least 10 minutes. Serve warm or at room temperature topped with scoop of vanilla ice cream.

20131027-210302.jpg I think this dish could be made a little bit better by adding a squeeze of lemon to the frozen fruit, but it was delicious as it was and I’m (not so) secretly looking forward to eating it again tomorrow. It’s a bunch of fruit and oatmeal, so it’s basically like eating a healthy breakfast-dessert. I’ll go with that.

Limoncello for presents!

Are you already thinking about what to make your favorite friends and family members for the holidays this year? I bet you totally are (not) so I’m here to give you the easiest gift idea all of your fancy boozy pals will like. You do need some lead time, so consider this your weekend project! K? K.

Speaking of fancy, I had limoncello for the first time in Italy. It was served freezing cold in a fancy looking shot glass. I was 22 at the time so I did what any 22 year old with what looked like alcohol in a shot glass would do… I slammed it. The waiters did not approve. So, take note: this treat is meant to be sipped slowly. Bonus: your gift receivers will think of how awesome you are for a longer duration than a shot would take!

This is a two step process, each step taking no longer than about a half hour of active time with some waiting days in between.

Limoncello
makes 10-12 half pint jars    //    recipe adapted from Imbibe
Ingredients
12-15 organic lemons
2 (750 ml) bottles 80-100-proof vodka (one for now one for later, I used Svedka)
3.25 cups granulated sugar
5 cups water
20131024-184926.jpg

Directions:
STEP ONE
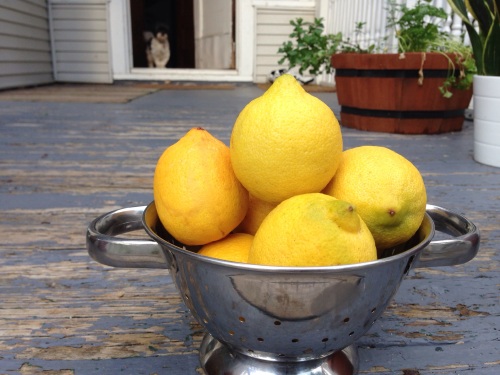
1. Buy the lemons! I found a big bag of organic lemons at Whole Foods for a decent price. I personally wanted organic, but that decision is up to you. Choose thick-skinned lemons, they are way easier to zest. Make sure the lemons are very yellow, not green, brown, etc.

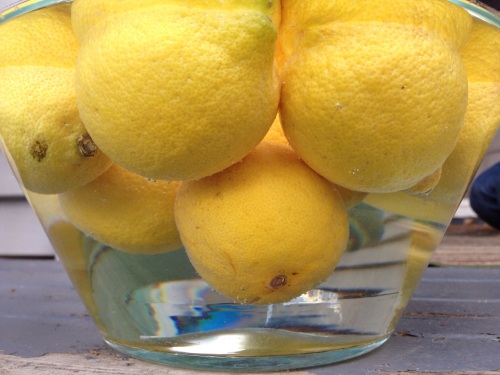
2.Wash the lemons with a vegetable brush and hot water to remove any reside of pesticides or wax; I soaked mine in a big bowl of hot before scrubbing. Pat the lemons dry.

3. Carefully zest the lemons with a zester or vegetable peeler so there is no white pith on the peel. NOTE: Use only the outer part of the rind. The pith, the white part underneath the rind, is too bitter and would ruin your limoncello.

4. Then, stick the rinds and one bottle of vodka in a jar together. Let them sit for anywhere between 10-40 days in a dark area of your house. The longer these are together, the stronger the lemon flavor will be, so I left them for the full 40 days, but I gather two weeks is enough time. The color of the liquid should be very dark and smell very strongly like lemon. 20131024-185029.jpg

20131024-185102.jpg

20131024-185139.jpg

STEP TWO (40 days later)
1. Strain the infusion through a colander or moistened cheesecloth into a clean jar or bowl. Make sure to to squeeze the last drops of liquid from the peels. Add the second bottle of vodka to the lemony vodka.

2.Combine the sugar and water in a saucepan over medium heat and stir until the sugar is completely dissolved and the syrup just comes to a boil. Remove from heat and let cool.

3. Add the syrup to the infused vodka. If you are impatient, you can add the syrup while it’s still warm to make cloudy Limoncello, but I thought it looked nicer clear so I waited.

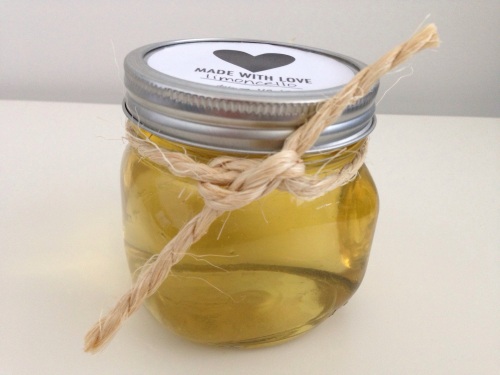
4. Pour the liqueur into sterilized bottles (tons of cute options out there, but I used ball jars), seal tightly and let rest another 10-40 days. Additional aging will result in a smoother marriage of flavors. Make sure people stick this in the fridge after a few weeks and drink it cold. It delicious alone, or as a base of a martini/cocktail type thing.

20131024-185358.jpg

20131024-185433.jpg

I found tons of free printable labels online, and really loved making this as a gift for lots of summer celebrations; birthdays, housewarmings, engagements, etc.

If you start this this weekend, you would be able to follow step one and let the flavors meld for the full 40 days, complete step two, let it sit for 9-10 days and be able to give this as a Christmas gift that would be ready to drink!  Go!

Cranberry Walnut Bread

I am my mother. I was making this recipe for Cranberry Walnut Bread when I realized this for about the 1,000th time in my life.

Every year my mom would make cranberry walnut and banana bread for her work’s bazaar to raise money. It was once a year and I remember she would spend what felt like an entire weekend baking.

So what did I find myself doing last night? Making Cranberry Walnut Bread for a work bake sale to raise money for United Way. I participated in the bake sale last year and knew I’d participate again when I found fresh cranberries from Wisconsin at the farmers market.

20131024-003530.jpg

Looks a little too much like Christmas…

Cranberry Walnut Bread
serves 16 // recipe modified from Ocean Spray
Ingredients
1 cup sugar
2 cups flour
1 ½ tsp baking powder
¾ tsp baking soda
1 tsp salt
2 T. canola oil
¾ cup orange juice
1 egg
1/3-1/2 orange, w/peel, ground in food processor
2 cups fresh cranberries, rough chopped (approximately)
1 cup walnuts (I like to use walnut pieces)

Directions:
1. Preheat oven to 350 and combine all dry ingredients. Mix thoroughly.

2. Whisk egg in orange juice, add oil and orange mixture to orange juice mix. Add to dry ingredients. Stir until mixed.

3. Add cranberries and walnuts.

4. Place in pans coated in a non-stick spray, filling the pans a little less than 3/4 full.

5. Bake at 350 until done. If you have a big loaf that serves 15 this could take 50-55 minutes. The smaller the loaf the less amount of time it takes.  The small loaves took about 30 minutes, the large loaf took almost the full 55 minutes. Make sure you stick a cake tester (or knife or toothpick) in the center to check if it’s done, if it comes out clean, take it out! Theses are awesome as muffins for breakfast too, the muffins took less than 20 minutes.

20131024-003633.jpg

20131024-003714.jpg

This recipe is very easy to double, so I did. This bread is so delicious; not overly sweet, has a hint of citrus, and makes a good dessert or breakfast. Thanks to my boss and co-worker who purchased it so my bread wouldn’t be the last baked good left on the table.